THE INTERFACE
Interface Overview
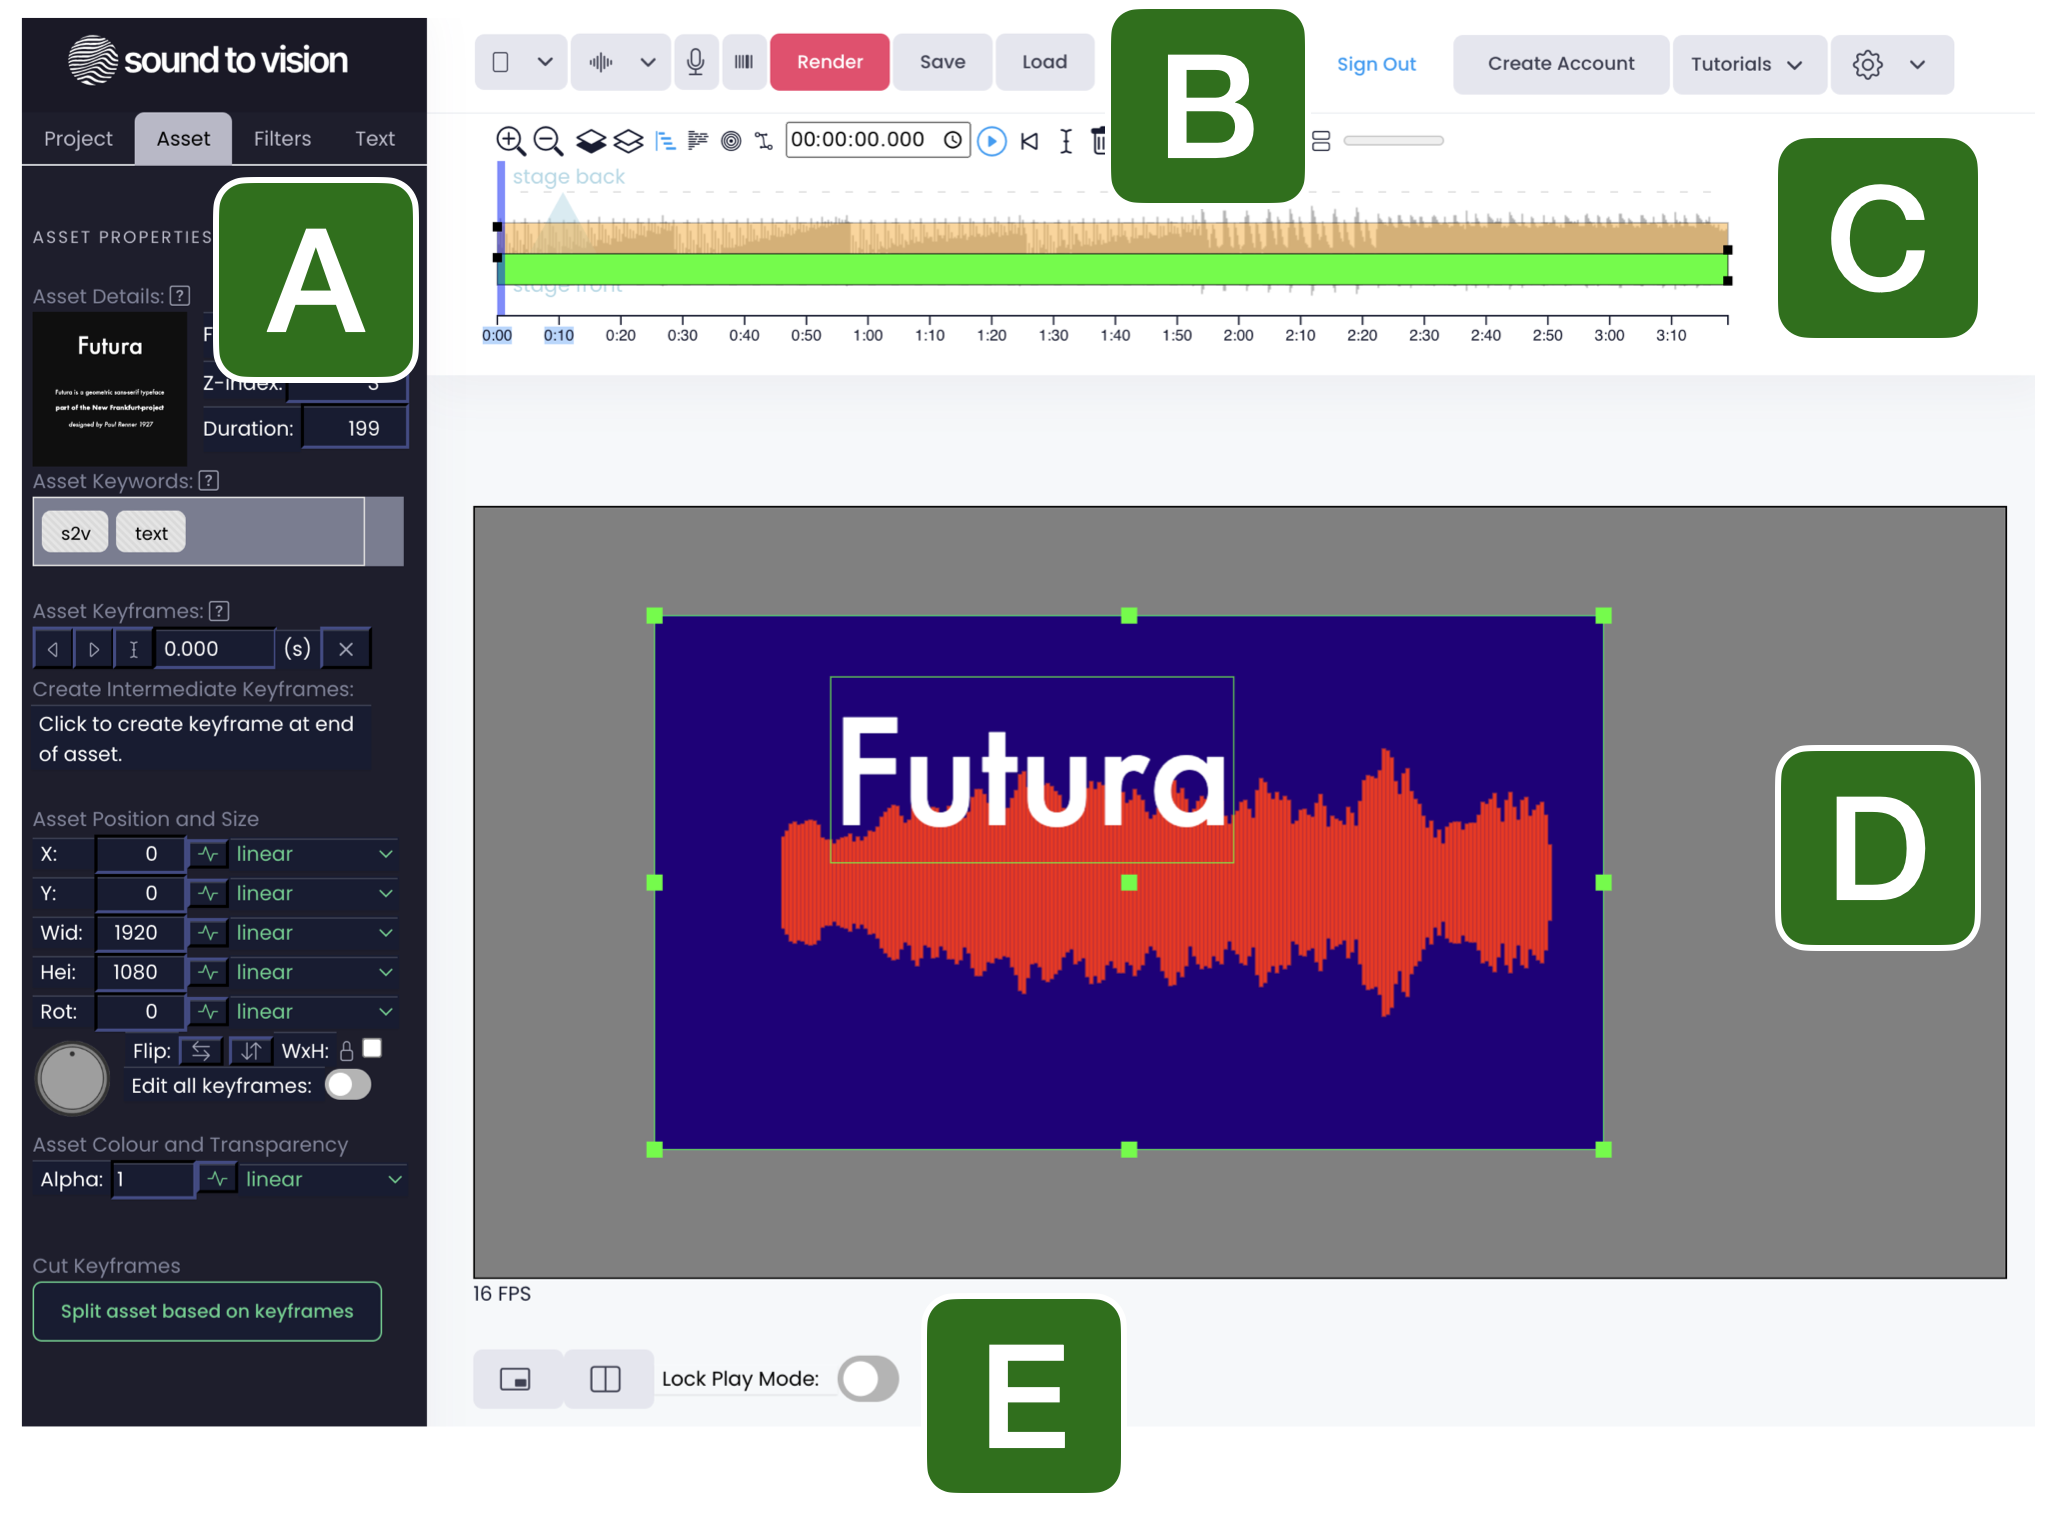
Figure 1: Interface Overview. A) The Properties Panel. B) SToV Menus C) The Timeline D) The Stage E) Preview Controls.
The Sound to Vision (SToV) interface has been designed to allow as much intuitive control over the different tools and assets that SToV has to offer. The Properties view allows the properties of the different assets and the project as a whole to be modified. The SToV Menus allow users to import music, activate the microphone or MIDI sources. Furthermore, the user can using these menus to render our videos of their creations, save and load projects, sign in to their online accounts, and also control their account settings. The Timeline is the interface area where users can control the temporal position of their assets, as well as create and view signals relating to the sound inputs. The Stage is where assets can be positioned and viewed in respect to one another in interactive mode, or for viewing the project when being played. Finally, the Preview Controls are buttons which control how the project is visualised when played or stopped, e.g. in interactive mode or play mode or full-screen or remote desktop mode.
The Properties Panel
The Properties Panel, contains multiple tabs which allow the properties of the project and the assets used to be modified. In addition, filters can be applied to assets in the 'Filters' tab and the different attributes of each filter controlled there.
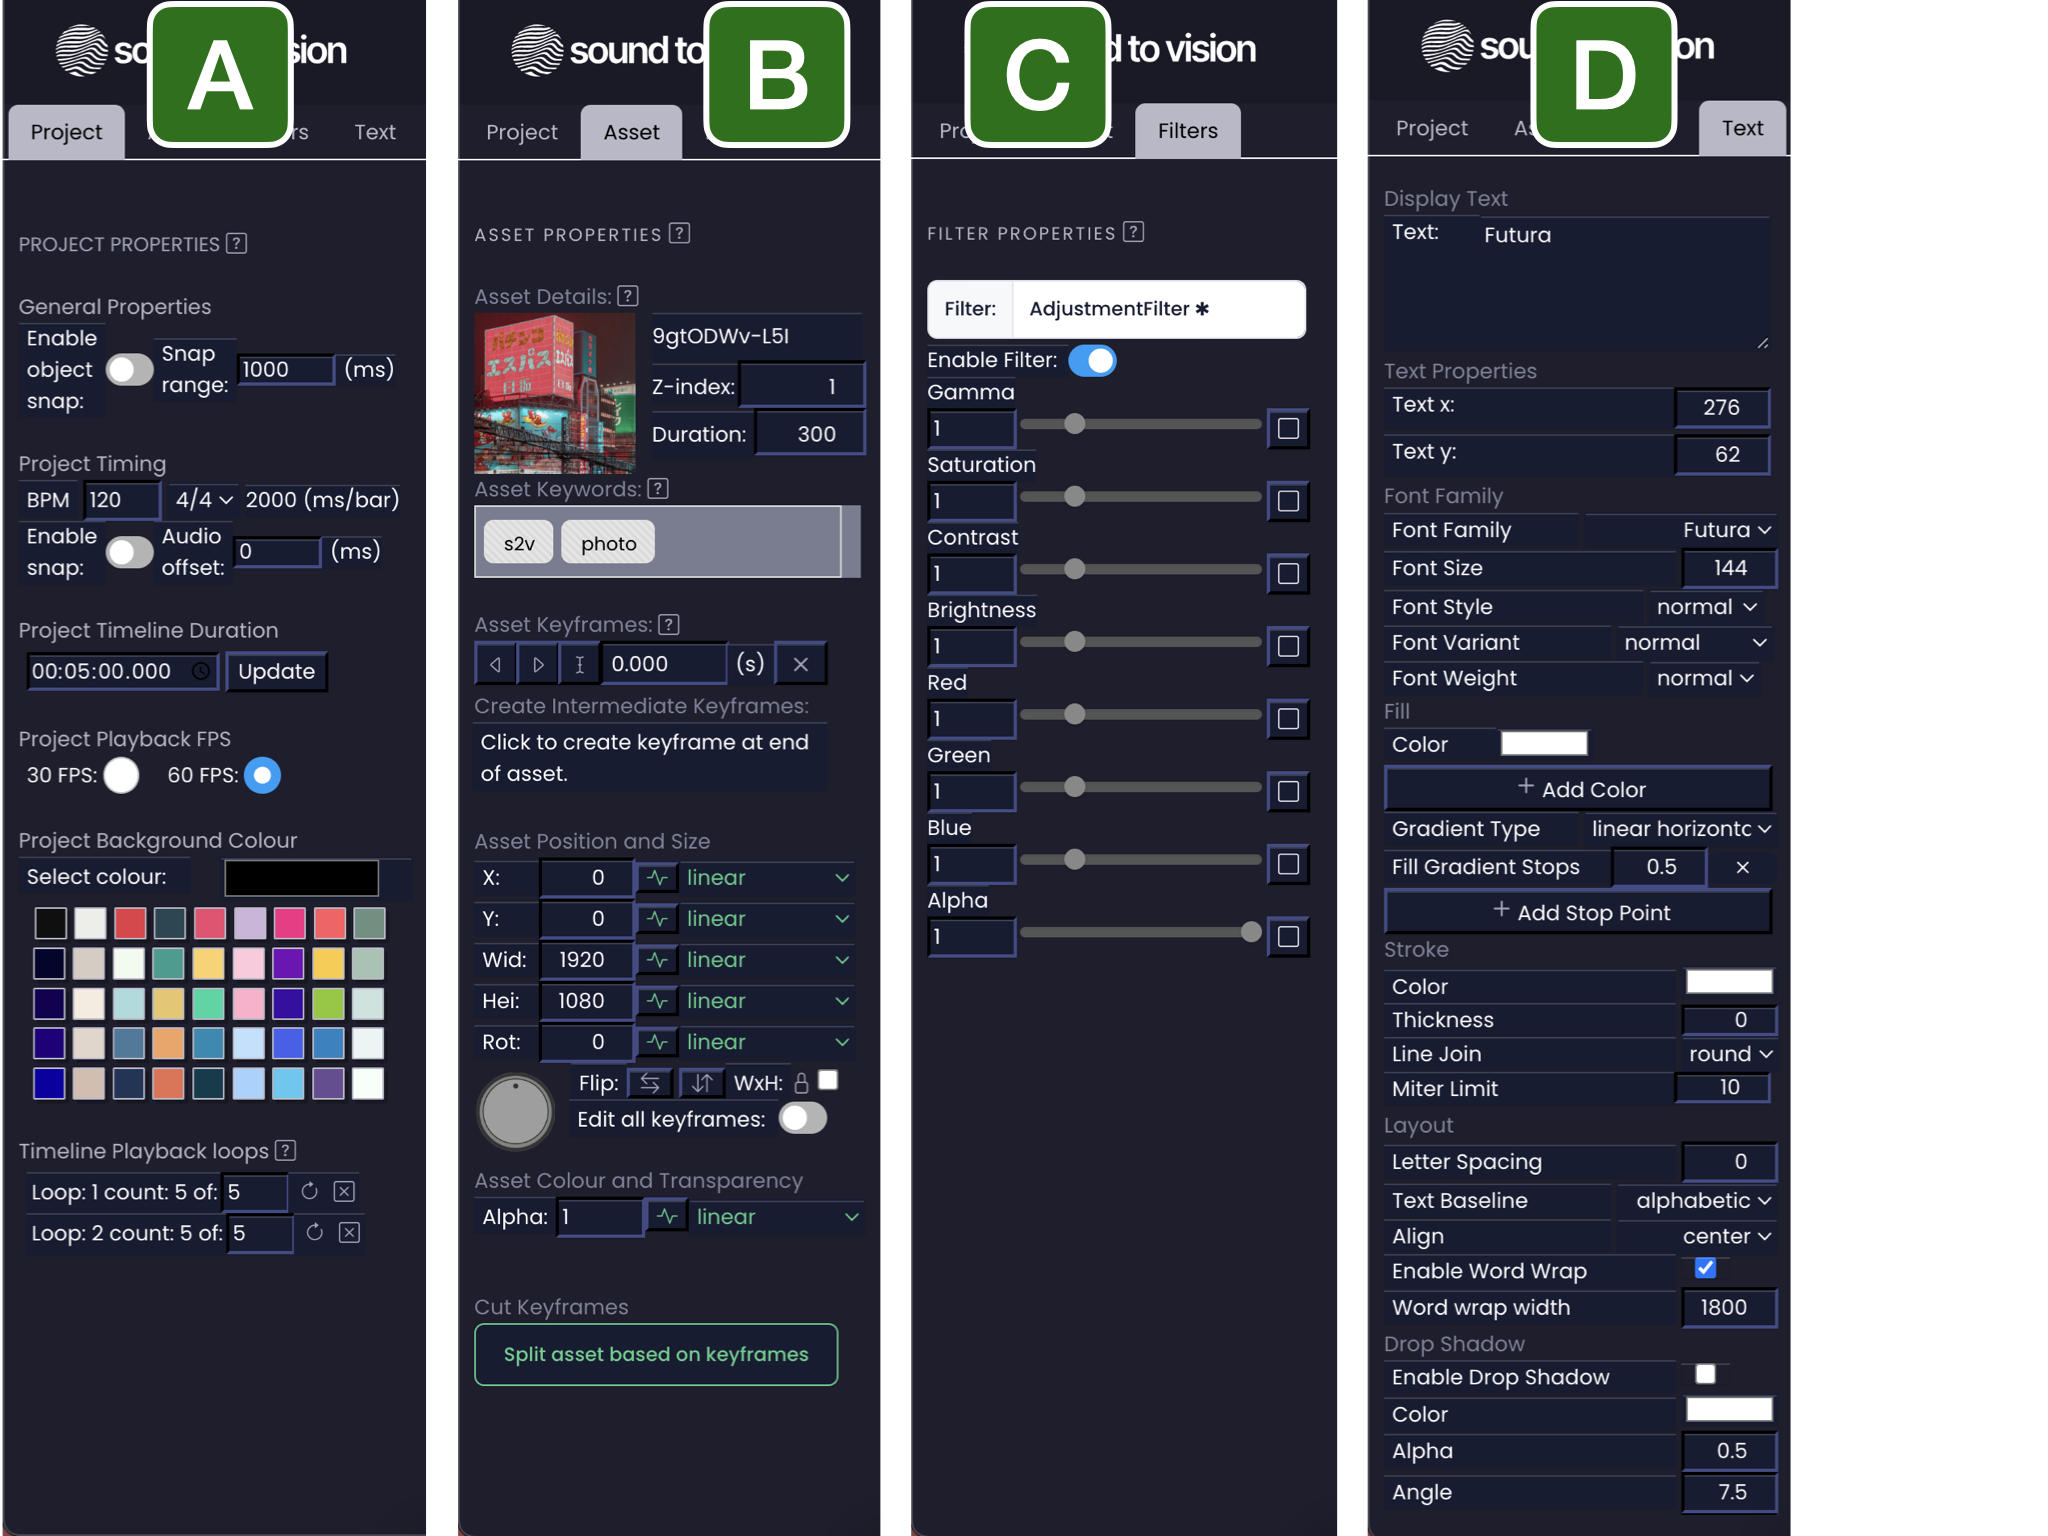
Figure 2: The Properties Panel. A) The Project Properties. B) Input and Output Menus C) The Timeline D) The Stage E) Preview Controls.
Project Properties Tab
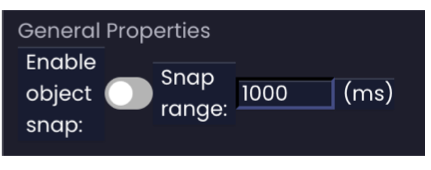
Figure : The Properties Tab, General Properties.
This tab controls the properties of the project as a whole, as well as the timeline settings. General Properties control the snapping of assets on the timeline. By clicking 'Enable object snap' you enable the behaviour that assets on the timeline will snap to one another, at either end. This makes it very easy to synchronize different assets to begin at the same time, or to synchronize a transition. The 'Snap range' input sets the tolerance for this snapping property in ms. The larger this value the further away objects can be when they snap into place.
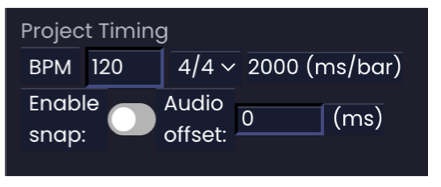
Figure : The Properties Tab, Project Timing.
The Project Timing options impose time signature properties onto the Timeline, and is very useful for synchronizing assets with imported music. When setup, this allows the user to snap assets to beats and bars timings as defined, enabling intuitive sychronization. For this, the 'BPM' (Beats Per Minute) and the time signature (e.g. 3/4, 4/4, 5/4) can be changed resulting in an updated 'ms/bar' property. To engage this snapping behaviour the 'Enable snap' must be toggled to 'on' (blue). With some audio files, the music will start playing, and the timing begin after a brief pause at the beginning. To correct for this, the 'Audio offset' property can be changed and used to introduce a delay before the timing kicks in, and so allowing perfect synchronization with beats and bars of the music.

Figure : The Properties Tab, Project Timeline Duration.
The Project Timeline Duration option allows the overall duration of the timeline to be changed. This will often default to the duration of music being imported, but can be manually specified by setting a duration here in hh:mm:ss:ms (hours, minutes, seconds and milliseconds) and then by clicking the 'Update' button.

Figure : The Properties Tab, Project Playback FPS.
The Project Playback FPS (Frame-rate Per Second) controls the speed of playback when playing projects live. If performance is not running smoothly, it maybe beneficial to cap the frame-rate to 30 FPS, rather than the default 60 FPS. Choppy playback may result from e.g. an under-powered computer or from overheating of the CPU. Please check the FAQ section for more details.
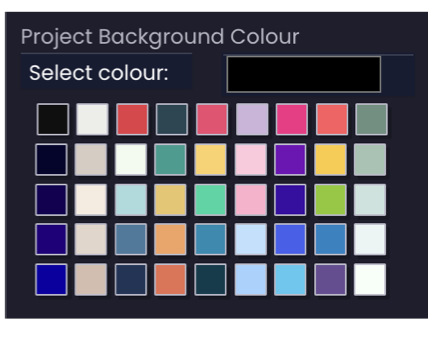
Figure : The Properties Tab, Project Background Colour.
The Project Background Color can be used to specify the background colour of the stage. Many assets have transparencies incorporated into them and so the choice of background colour can be a useful touch when defining the presentation of a project. It is possible to select a specific colour by clicking the larger swatch in the the top-right corner, or by selecting one of the pre-defined palette choices below it.
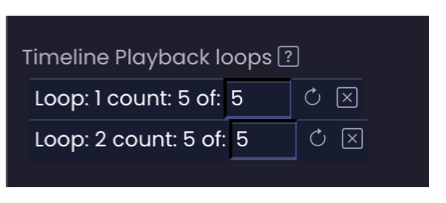
Figure : The Properties Tab, Timeline Playback Loops.
The Timeline Playback loops section is used to control any loops that have been defined on the timeline. Entries will appear here if a loop has been created using the 'Create Loop Region' button in the Timeline Controls view. From here, loops can be monitored, reset and removed entirely if needed. If the playpoint enters a loop during 'live play' it will loop round to the beginning of loop when the time of the playpoint intersects the loop boundary. This will loop the playpoint back to the beginning of the loop region and then will continue playing. This will occur a number of times, equal to the number set in the input box above (default 5). If '-1' is set in this input this region will keep looping until the count is rest. Loop counters when played, will not reset automatically, and so the 'reset' button can be used to reset the number of loops iterations. The 'x' button is used to remove any loop regions previously created, but no longer needed.
Asset Properties Tab
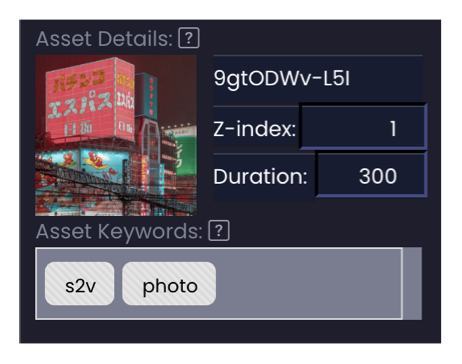
Figure : The Asset Tab, Asset Details.
TheAsset details section contains general details for the asset. E.g. the Name of the asset, The Z-index, the duration and any keywords associated with the asset. The 'Z-index' represents the order in which assets appear on the stage. A higher Z-index will result in an asset appearing in front of assets with a lower index. When assets are dragged around the Timeline the Z-index will be automatically updated and show here. It is also possible to update the index manually here, and this setting will override the value derived from the asset's position on the stage. This is designed to allow efficient ordering of assets, even when there are many assets being used.
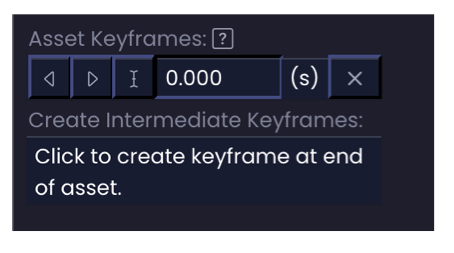
Figure : The Asset Tab, Asset Keyframes.
Keyframes are a fundamental concept in animation, used to define specific points in time where a change in an object's properties occurs. These properties can include position, rotation, scale, color, and more. Keyframes serve as markers that indicate the start and end of an animation sequence or the points where significant changes in the animation happen. Conventionally, artists would draw keyframes by hand, and then additional frames (in-between frames) would be created to smooth out the motion between keyframes. This process, known as "tweening," helps create fluid and realistic animations. In the context of digital animation and SToV, keyframes are used to streamline animations which are applied to assets using the timeline and properties view.
Setting Keyframes:
By default, SToV automatically sets a keyframe at the start of every asset. To add more keyframes, a user can use the 'Add keyframe' button in the Timeline Controls or through using the options in the 'Asset Keyframes' section shown above. If only one keyframe is present, the dialog will ask if you want to create a keyframe at the end of the asset. If more than two keyframes are present the dialog will ask how many keyframes you want to insert between the selected keyframe and the next keyframe. It is possible to adjust the timing and spacing of keyframes on a timeline using the time input and specifying the time in seconds. Adding additional keyframes will refine and enhance the animation by introducing more changes to the object's properties. It is possible to navigate between the created keyframes using the arrow buttons, and also to reposition the playpoint of the timeline (and updating the stage) on the selected keyframe, using the 'cursor' icon button.
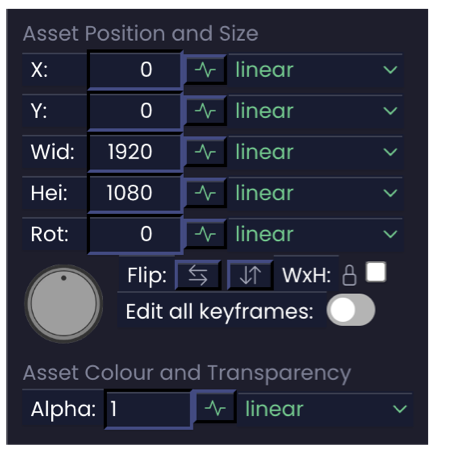
Figure : The Asset Tab, Asset Position and Size.
The properties of any selected keyframe can be controlled using the Asset Position and Size section. Changing the asset X or Y properties using the input boxes above, or by clicking and dragging the asset on the stage, will change the position of the asset in that keyframe. If more than one keyframe has been previously created, the position properties will only update in the selected keyframe, and properties will exist in each keyframe. If this is the case, and there are different position values between the two keyframes, SToV will calculate the intermediate values for the object's properties, creating a smooth transition between the keyframes. The same is true for the width and height (Wid and Hei) properties of the keyframe and also the rotation, and the alpha property and tint property when available. Interpolation is an important concept used to inform how an animation is performed between keyframes.
Setting Interpolation Method:

Figure : The Asset Tab, Asset Position and Size.
If the green wave icon is selected (as in above diagram), it is possible to select different interpolation methods. Different interpolation methods, such as linear (default), ease-in, or ease-out, can be applied to control the acceleration and deceleration of the animation, creating specific effects, the different methods are visible in drop-down menu shown in green in the above diagram. Keyframes are crucial for creating dynamic and expressive animations, allowing animators to focus on defining key moments in the motion and letting SToV handle the generation of in-between frames. This approach makes the animation process more efficient and flexible, enabling artists to iterate and refine their work easily.
Setting Interpolation Method:
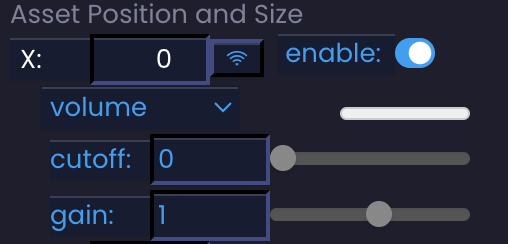
Figure : The Asset Tab, Asset Position and Size. Signal settings
In addition to interpolation it is possible to apply a further signal modification using audio signals to the properties of an asset using either a microphone or audio file as a source. For example an asset could be made to move when the volume of the music increases past a certain level. This would be achieved by setting the 'enable' toggle to 'on' (blue background), the cut-off to say '0.1' (0.0 is quietest and 1.0 is loudest) and the gain to '2'. This would result in a movement which would shift the asset to potentially double the stage width proportionally dependent on the volume of the audio. When the project is played, and audio detected the behaviour would be observed. This is in addition to any interpolation or any MIDI signals (see below) which have been setup.
Setting Interpolation Method:
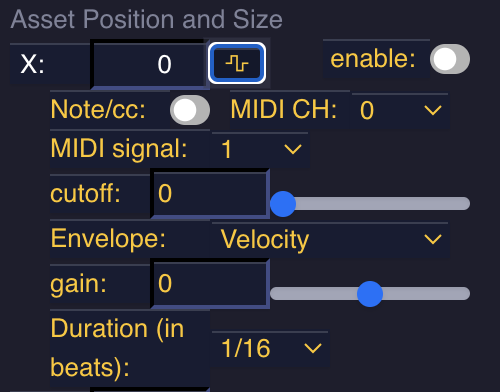
Figure : The Asset Tab, Asset Position and Size. MIDI settings
Furthermore, it is possible to trigger modifications to the properties of the asset by using MIDI signals as a source. For example, an asset could be made to shift in position when a specific MIDI note is detected on channel 3. This would be achieved by setting the 'enable' toggle to 'on' (blue background), the note toggle to 'note' the MIDI channel to '3' or 'all', the MIDI signal to say '67' and the gain to '0.5'. This would result in a movement which would shift the asset to half the stage width when this MIDI note was fired. When the project is played, whenever the MIDI note is played, the behaviour would be observed. This is in addition to any interpolation of audio signals which have been setup.
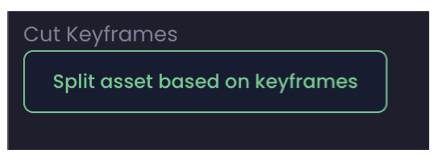
Figure : The Asset Tab, Cut Keyframes.
Filters Properties Tab
TODO TODO TODO TODO TODO TODO TODO TODO TODO TODO TODO TODO TODO TODO TODO
Text Properties Tab
TODO TODO TODO TODO TODO TODO TODO TODO TODO TODO TODO TODO TODO TODO TODO
The Sound to Vision Menus

Figure : The SToV Menus. A) The 'New Empty Stage' menu. B) The 'Import Audio' menu. C) The 'Turn On Microphone' button D) The 'Import MIDI' button. E) The 'Account Settings' menu. The textual buttons, include the 'Render' dialog button, the 'Save' project button, the 'Load' saved project button. The 'Sign In' button, the 'Create Account' button and the 'Tutorials' menu.
The SToV menus are located at the top of the interface screen and facilitate the user to access input and output options for audio, video rendering as well as save and load functionality for the project as well as account settings.
New Empty Stage
This button when clicked provides a menu. The options represent the form factors for the stage. Clicking one of the options will create an empty stage with the dimensions selected. The options represent many of the common form factors for popular social media platforms:
- Default 1920x1080 (16:9)
- Instagram 1080x1920 (9:16)
- Instagram 1080x1350 (4:5)
- YouTube 1920x1080 (16:9)
- YouTube 1080x1080 (1:1)
- Twitter 1280x720 (16:9)
- Twitter 720x720 (1:1)
- Twitter 720x1280 (9:16)
When selected an empty stage will be created, and all assets cleared from the Timeline. 4K resolution is also available when rendering, in essence doubling the quoted resolutions above.
Import Audio
To get the most from SToV it is important to import or create signals. One way of doing this is to import audio music into the project. This can be done with the 'Import Audio' menu. Either choose from a number of demo tracks or import your own music, in one of a number of popular formats (*.mp3, *.wav, *.ogg, *.mp4), please check your browser for all supported formats. Once imported your audio sound wave will appear visualised on the 'TimeLine View', in addition the frequency distribution of your audio will appear on the 'Underlying Frequency Distribution' view. By default, your imported audio will also be exported to any rendered videos you make from this project.
Turn On Microphone
Another input signal available to users with a microphone is accessible with the 'Turn on Microphone' button. Upon clicking, your browser will ask permission to use the microphone. If you agree to this request, the microphone will provide signal to the SToV interface. This will wipe any imported audio from the interface, and the signal is only usable for live performances, not in rendered signals, as it is not recorded. If your system has multiple microphones, the interface will use the 'default' device of your browser. To change the microphone, access your browsers settings, change the microphone and then refresh the soundtovision.com webpage to be sure of applying the change.
Import MIDI
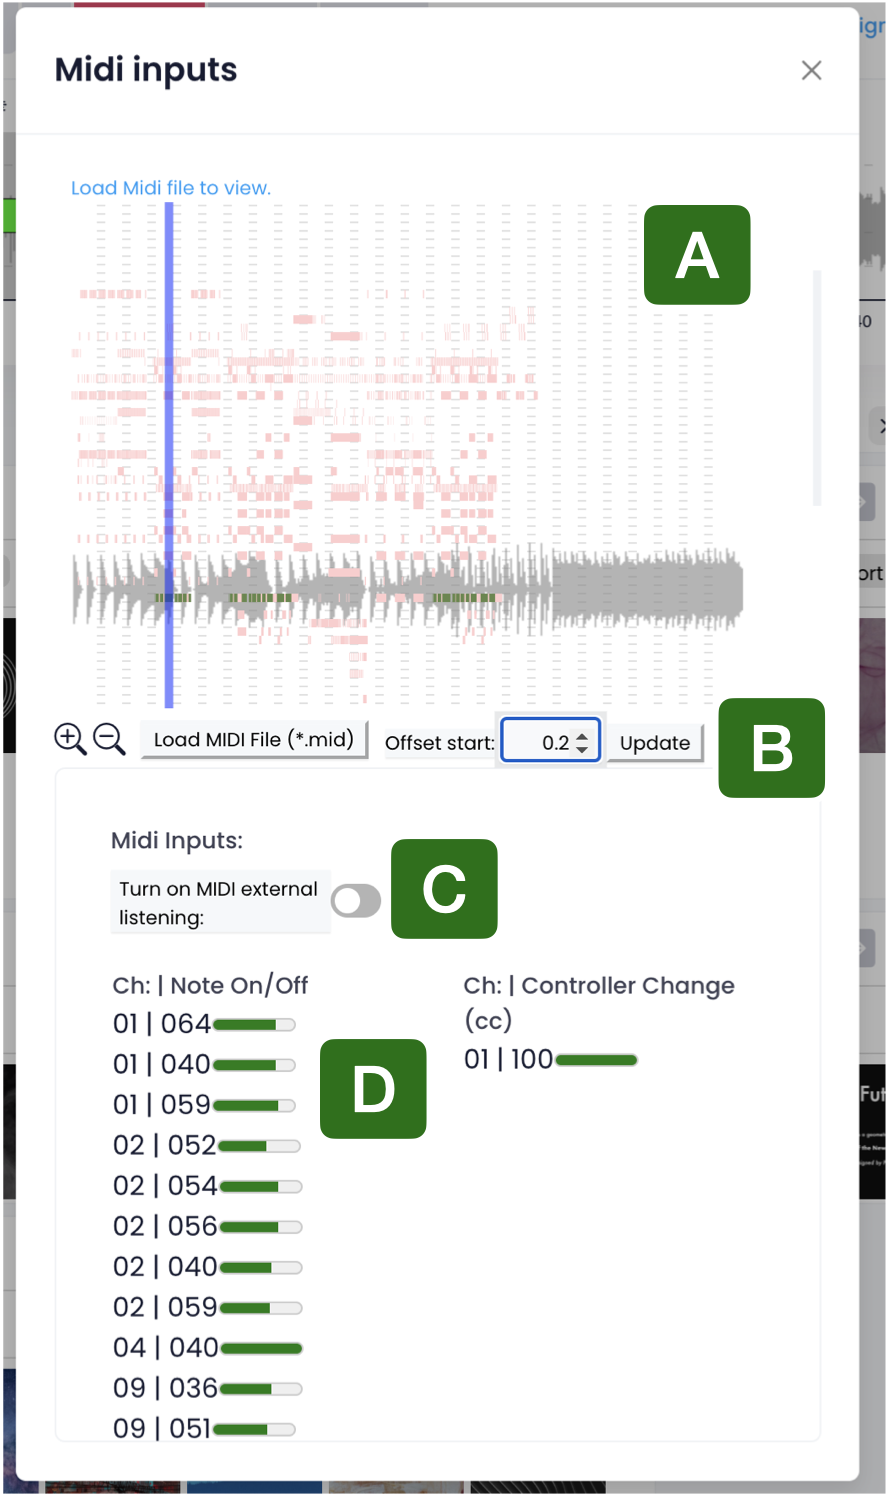
Figure : Import MIDI Dialog Screen. A) The MIDI View B) The MIDI View Toolbar C) The MIDI external toggle D) MIDI Notes and Controller Signals
MIDI (Musical Instrument Digital Interface) is a music format for creating signals which can be used to control visual elements in SToV. The 'MIDI Dialog Screen' allows you to import MIDI files (*.MID, *.mid) using the 'Load MIDI File' button. Selected files of the correct format will load and the MIDI signals will be visualised on the 'MIDI View'. Some MIDI files are not synched with the start of audio files they are associated with. To synchronize the files, the 'Offset start' input can be used to offset the MIDI signals by a delay in seconds. The 'Update' button applies this offset to the MIDI signal. The 'Turn on MIDI external Listening' button allows you to toggle SToV's access to MIDI signals being created by a MIDI device connected to your computer in real-time. When MIDI signals are playing either when the timeline is being played and a saved file is loaded, or external devices are playing it is possible to see what notes and controllers are active with the 'MIDI Notes and Cotroller Signals' area. Incoming signals will be displayed along with their velocity. This can serve as a guide to inform which signals to listen on when creating visual elements which are going to be reactive to these inputs. The MIDI channel and note/controller are displayed for each incoming signal.
Render
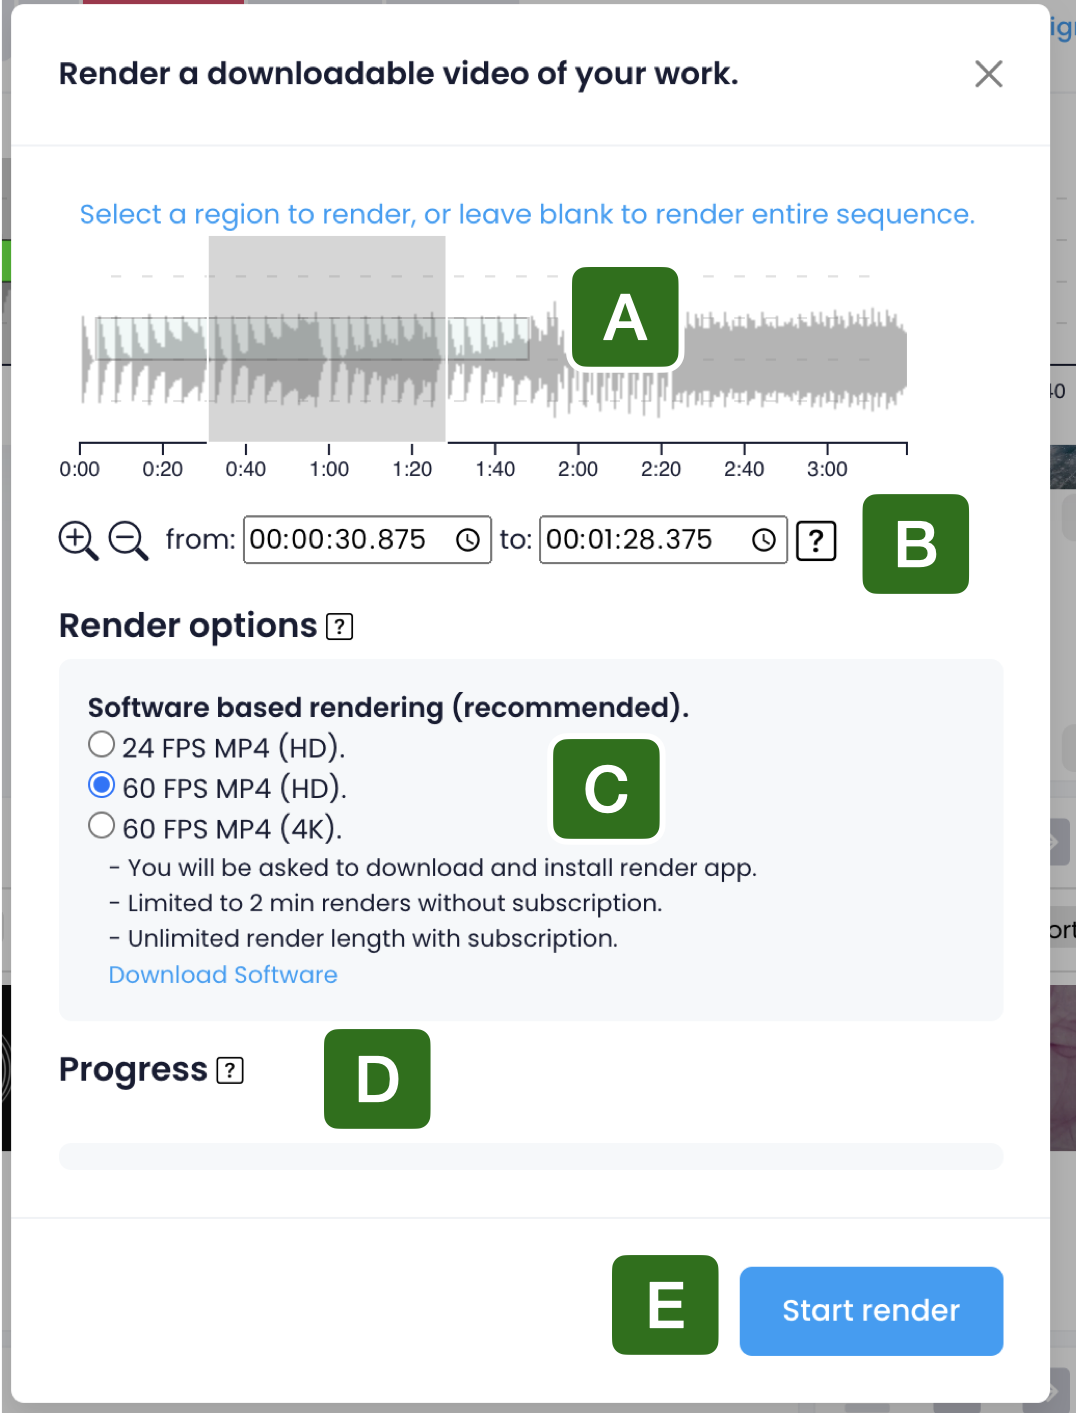
Figure : Render Dialog Screen. A) Render Timeline View B) Render Timeline Controls C) Software based rendering D) Progress bar E) Start Render Button
By clicking the 'Render' button on the menu bar, the Render Dialog Screen opens. This functionality is used for creating downloadable video copies of your creations. Several options are available. It is possible to render out some or all of your video by clicking and highlighting the 'Render Timeline View'. Alternatively you can type in the desired temporal range using the time input boxes on the 'Render Timeline Controls' toolbar. There are multiple render options. Click an option to set the rendering mode:
- 24 FPS MP4 (HD) - Will render a 24 FPS version of your video, quick to produce, good for previewing
- 60 FPS MP4 (HD) - Will render a 60 FPS version of your video at the default video quality
- 60 FPS MP4 (4K) - Will render a 60 FPS version of your video at 4K resolution, slower but high quality.
Save
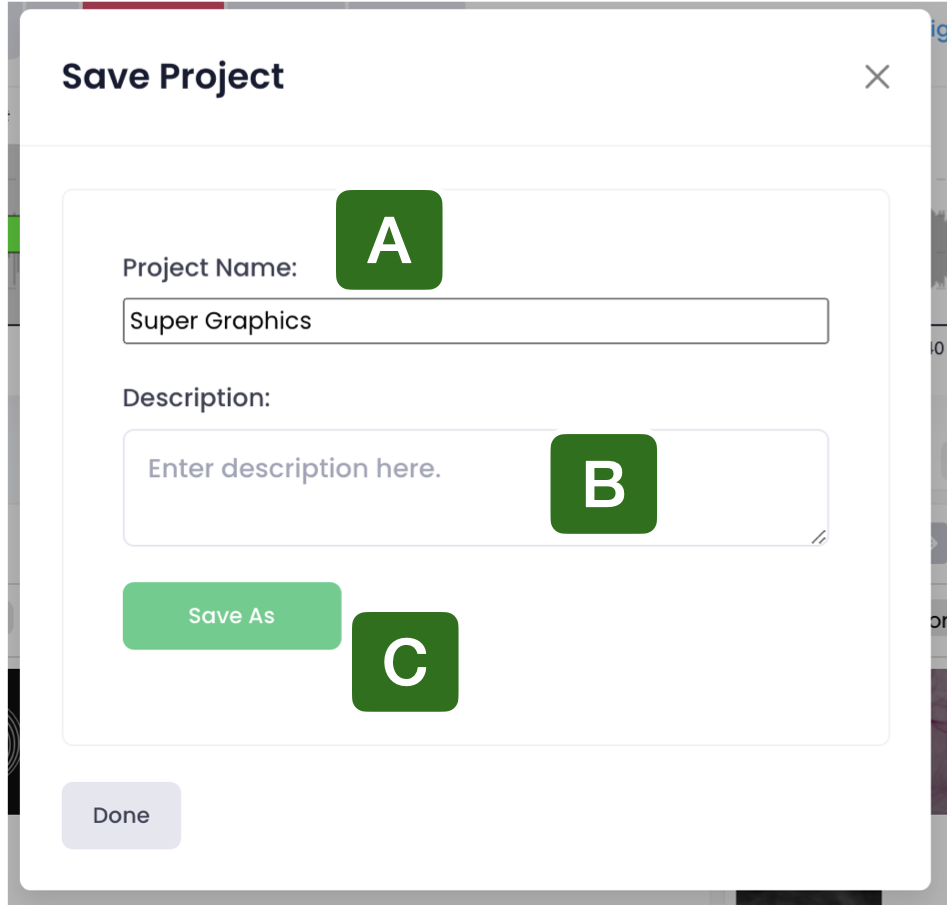
Figure : Save Project Dialog A) Project Name input B) Project Description input C) The Save As, button.
Use this dialog to save your projects. Add a 'Project Name' and a 'Project Description' for quick reference. Click 'Save As' to save your project, if the 'Save' button appears, click this to save over your existing project, or 'Save As' to create a new project save. If some of your assets have not yet been uploaded to the SToV server, you will be prompted to upload them. If you don't upload them, you can still save your project, but when you load it you will be prompted to re-add your assets from their location on your computer.
Load
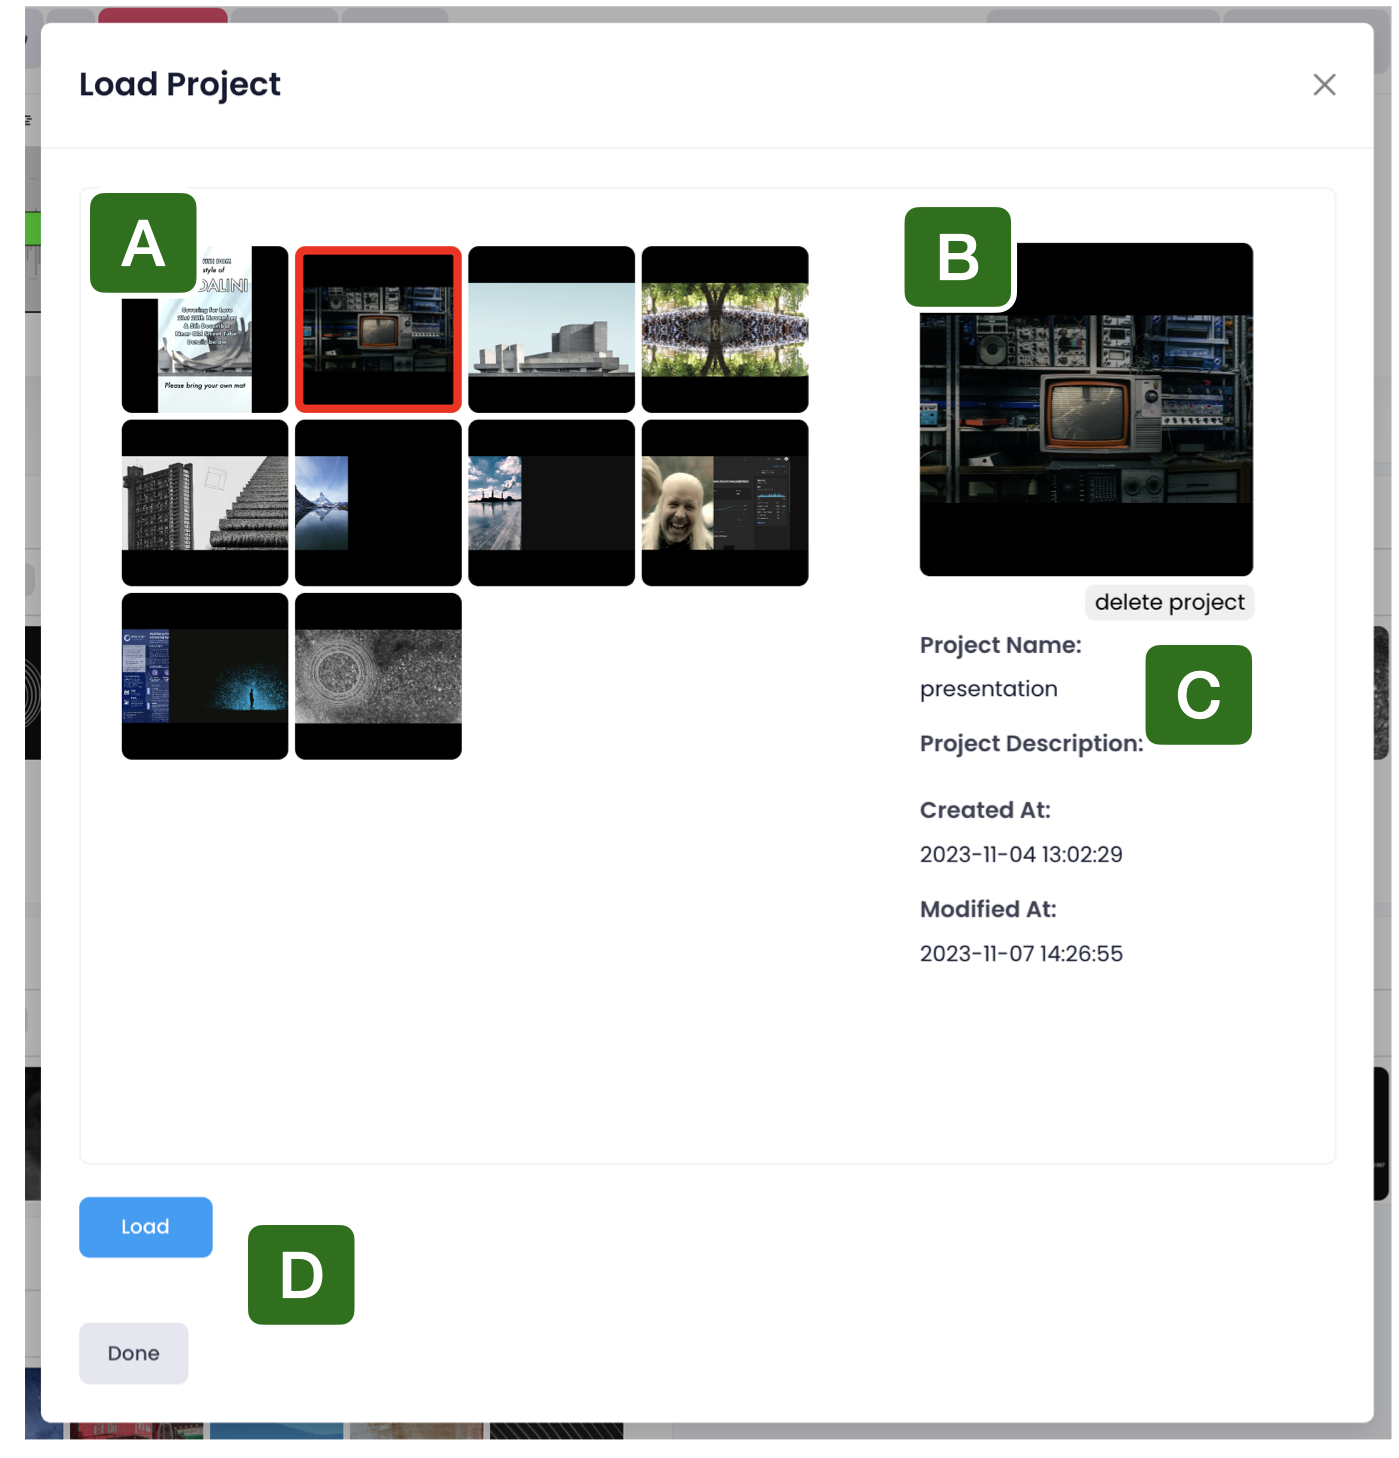
Figure : Load Project Dialog A) Project Grid View B) Selected Project thumbnail C) Selected Project Details D) The Project Load Button.
The 'Load Project Dialog' is used to load projects that have been previously saved. Browse projects by their thumbnail using the 'Project Grid View', click a project to preview its named and description. Click the 'Load' button to load the project and download any assets included with the save file.
Sign In/Out
To get the most from SToV's features it is necessary to create an account and to sign in. By signing in you gain access to saved project files, assets in the cloud and other exclusive member features. Click here to create an account. Once signed in, this button will change to a sign out button. If using a shared computer, be sure to sign out when leaving the computer.
Create Account
To create an account and get access to SToV's exclusive membership features please use this link.
Tutorials
Learning to use SToV is very straightforward with these interactive tutorials, click and access the tutorials in order to learn how to use SToV and its various features.
Account Settings
The account settings menu allows users to access important settings for their account. From this menu users can access several functionalities
- Manage Account - Subscribe to newsletter, change name and email settings, cancel account.
- Keyboard Shortcuts - View keyboard shortcuts for using SToV in optimised way.
The Timeline
The Timeline and its associated buttons allow the user to create compositions of their assets, arranged by time and depth. Import assets by simply dragging and dropping them onto the Timeline. By placing photos, text and videos and other elements in different layers it is possible to create unique compositions which transform through time. Copy, paste, split, and trim directly on the Timeline for precision temporal editing.
Timeline Controls

Figure : Timeline Controls. A) Zoom In and Out. B) Remove and Add layers. C) Toggle Asset Timeline. D) Toggle Frequency Distribution. E) Toggle Signal Generator Interface. F) Coming Soon. G) Playpoint Time Indicator. H) Play/Pause Project I) Reset to beginning. J) Track Playpoint K) Delete Asset L) Create Keyframe M) Loop playback toggle N) Create Loop Region O) Copy Asset P) Paste Asset Q) Squidge Asset R) Input Volume Meter.
The 'Timeline Controls' largely affect the mechanics of the timeline, but also have other uses. The 'Zoom In' and 'Zoom Out' buttons allow the user to zoom in and out of the timeline in the time axes, and so zooming out will show a larger portion of the project timespan and zooming in will allow the user to discriminate subtler transitions. A project can have many layers on which to order and organise the assets. Some projects require more assets than others. The user can remove layers or add layers by using the 'Remove Layer' and 'Add Layer' buttons respectively, enabling the number of layers to be controlled exactly.
Timeline View

Figure : Timeline View. A) The 'Playpoint'. B) An 'Asset'. C) A 'Keyframe' visualised in an asset. D) An 'Anchor' point. E) The 'Time Axis' of the Timeline. F) The presently selected asset (highlighted in green).
The 'Timeline View' is where assets are arranged in terms of layer (depth, z-index) and through time, with the asset boundaries representing when the assets appear and disappear. Assets can be dragged and placed directly on the Timeline View, from the asset cards located below. By doing this, the asset will occupy temporally all the available time on that layer. The alternative is to click and drag an area of the view, which will be highlighted in grey, and then drag an asset on to that area. This allows you to select a layer and temporal region for the asset to occupy and saves you then moving the asset subsequently. Placed assets on the timeline can be dragged to different layers and also have their span changed by clicking and dragging the anchor boxes at each end of the asset. Different assets types have different colours representing them with an easy visual reference. To find out more about the asset types, please visit the assets page. Assets can be selected by double-clicking with the left mouse button. This will focus the properties view on this specific asset and also show its spatial anchors in the 'Stage' context. Assets don't need to be selected for them to be moved around the Timeline View, though for them to be moved around the 'Stage', they do need to be selected. The 'Playpoint' (i.e. blue horizontal line) represents the current time point of the project, and will represent what assets are visualised at that time on the stage. The position of the 'Playpoint' and the 'Playpoint Time Indicator' directly correlate, and changing one will be reflected in the other. The 'Playpoint' can be clicked and dragged along the Asset view, and this will change the 'Playpoint Time Indicator' and the appearance of assets on the stage accordingly.
The Stage
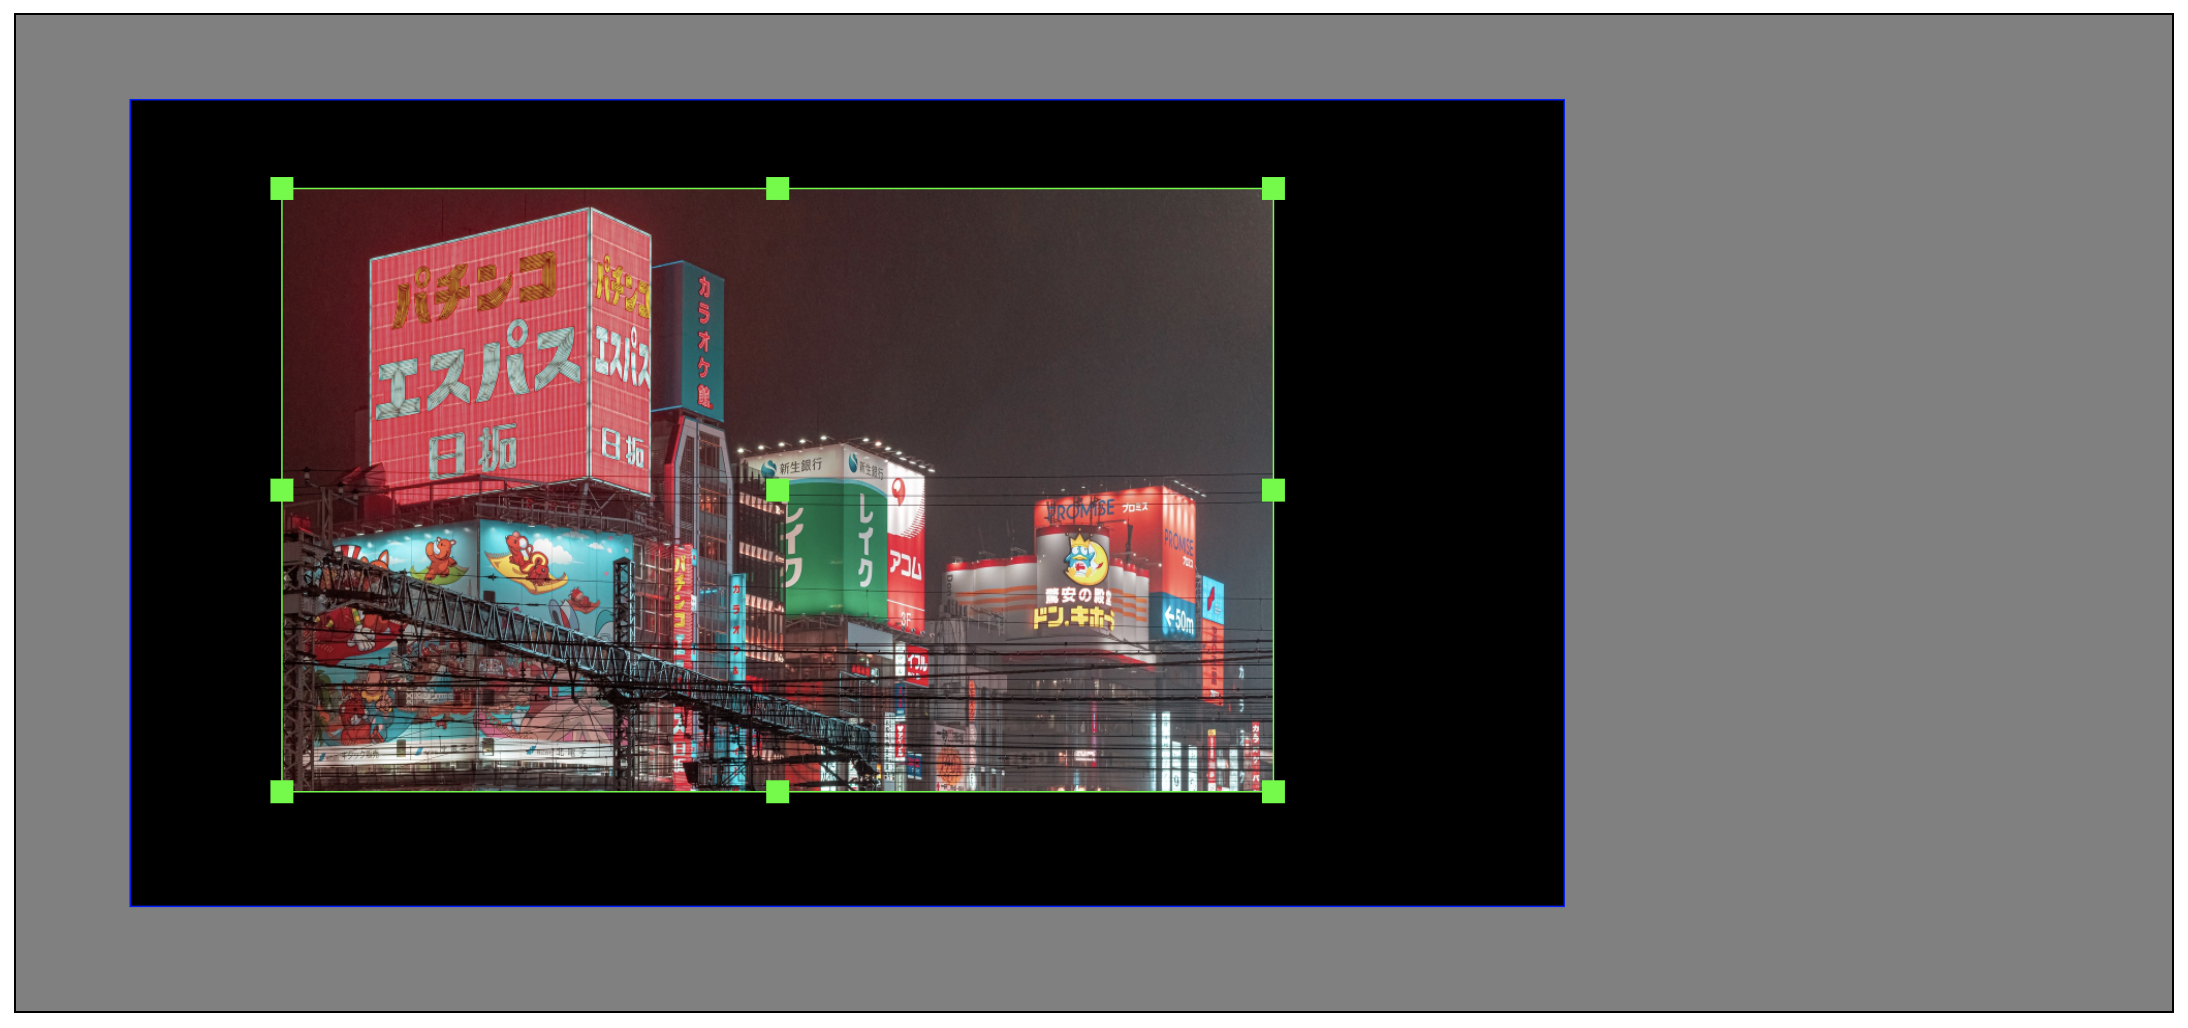
Figure : The Stage. The 'Stage' (grey) with a landscape 'Canvas' and one image based asset (with green border and handles), shown in 'interactive' mode.
The stage has two modes: 'interactive' and 'live'. 'Interactive' mode is where the position of assets are coordinated. If an asset is selected on the Timeline, they can be adjusted on the stage using the green handles that appear in 'interactive' mode. By clicking and dragging the asset, it can be moved, by adjusting the anchors directly, it can be resized. Adjusting the corner anchors resizes the width and height of each asset proportionally, whereas the other anchors resize the width and height non-proportionally. When the project is playing in 'live mode', the 'Stage' will show only the project 'Canvas' and will display video and graphics playing in real-time. If a new project is created with different dimensions, the 'Canvas' will appear as a different shape too, to reflect the proportions of the project.
Live-Mode Controls

Figure : Live-Mode Controls. From Left-to-Right: Fullscreen mode, split-view mode and 'Lock Play Mode'.
The 'Live-Mode Controls' are used to change the way in which the project is shown during 'live' mode. For example, a project can be played in full screen using the 'Fullscreen mode' button. This view is cancelled, using the 'Esc' button. The 'Split-view mode' is used when wanting the display on a separate screen, this is very useful when showing the project in 'live' mode on e.g. a projector, whilst also being able to tweek parameters on e.g. a laptop screen. For this your laptop must be set to have multiple screens and not 'mirror' which would duplicate only one of your screens. The 'Lock Play Mode', when toggled 'on' will keep the player in 'live' mode even when the playing is stopped. This ensures during performances that the audience will not see interactive mode elements like e.g. asset handles even if the presentation is stopped.
