
SToV DESKTOP FEATURES
Introduction
Sound to Vision Desktop (SToV-Desktop) is a self-contained application that runs directly on your computer desktop. Unlike the SToV Browser software, the SToV-Desktop app provides full access to your computer’s file system, along with additional advanced features for processing and managing media files. To find out more about purchasing SToV-Desktop please visit the software page. This page offers a high-level overview of the SToV-Desktop features, each accessible via the menu tabs at the top of the desktop application.
File Manager View
This view allows you to add and manage media files in bulk. Individual files can be imported by dragging them into SToV-Desktop at any time. The File Manager also enables the collective import of multiple files and even entire folders. Once imported, media files are presented as assets, which can be grouped into structures called Asset Pools.
Asset Pools are a simple but powerful way to organize assets within SToV, allowing for efficient filtering and project-based grouping. Imported assets are initially added to the ‘Imported’ Asset Pool. From there, they can be selected and either moved or copied to other asset pools. This Asset Pool system is consistent across all SToV-Desktop views, making it easy to find and use assets throughout the application.
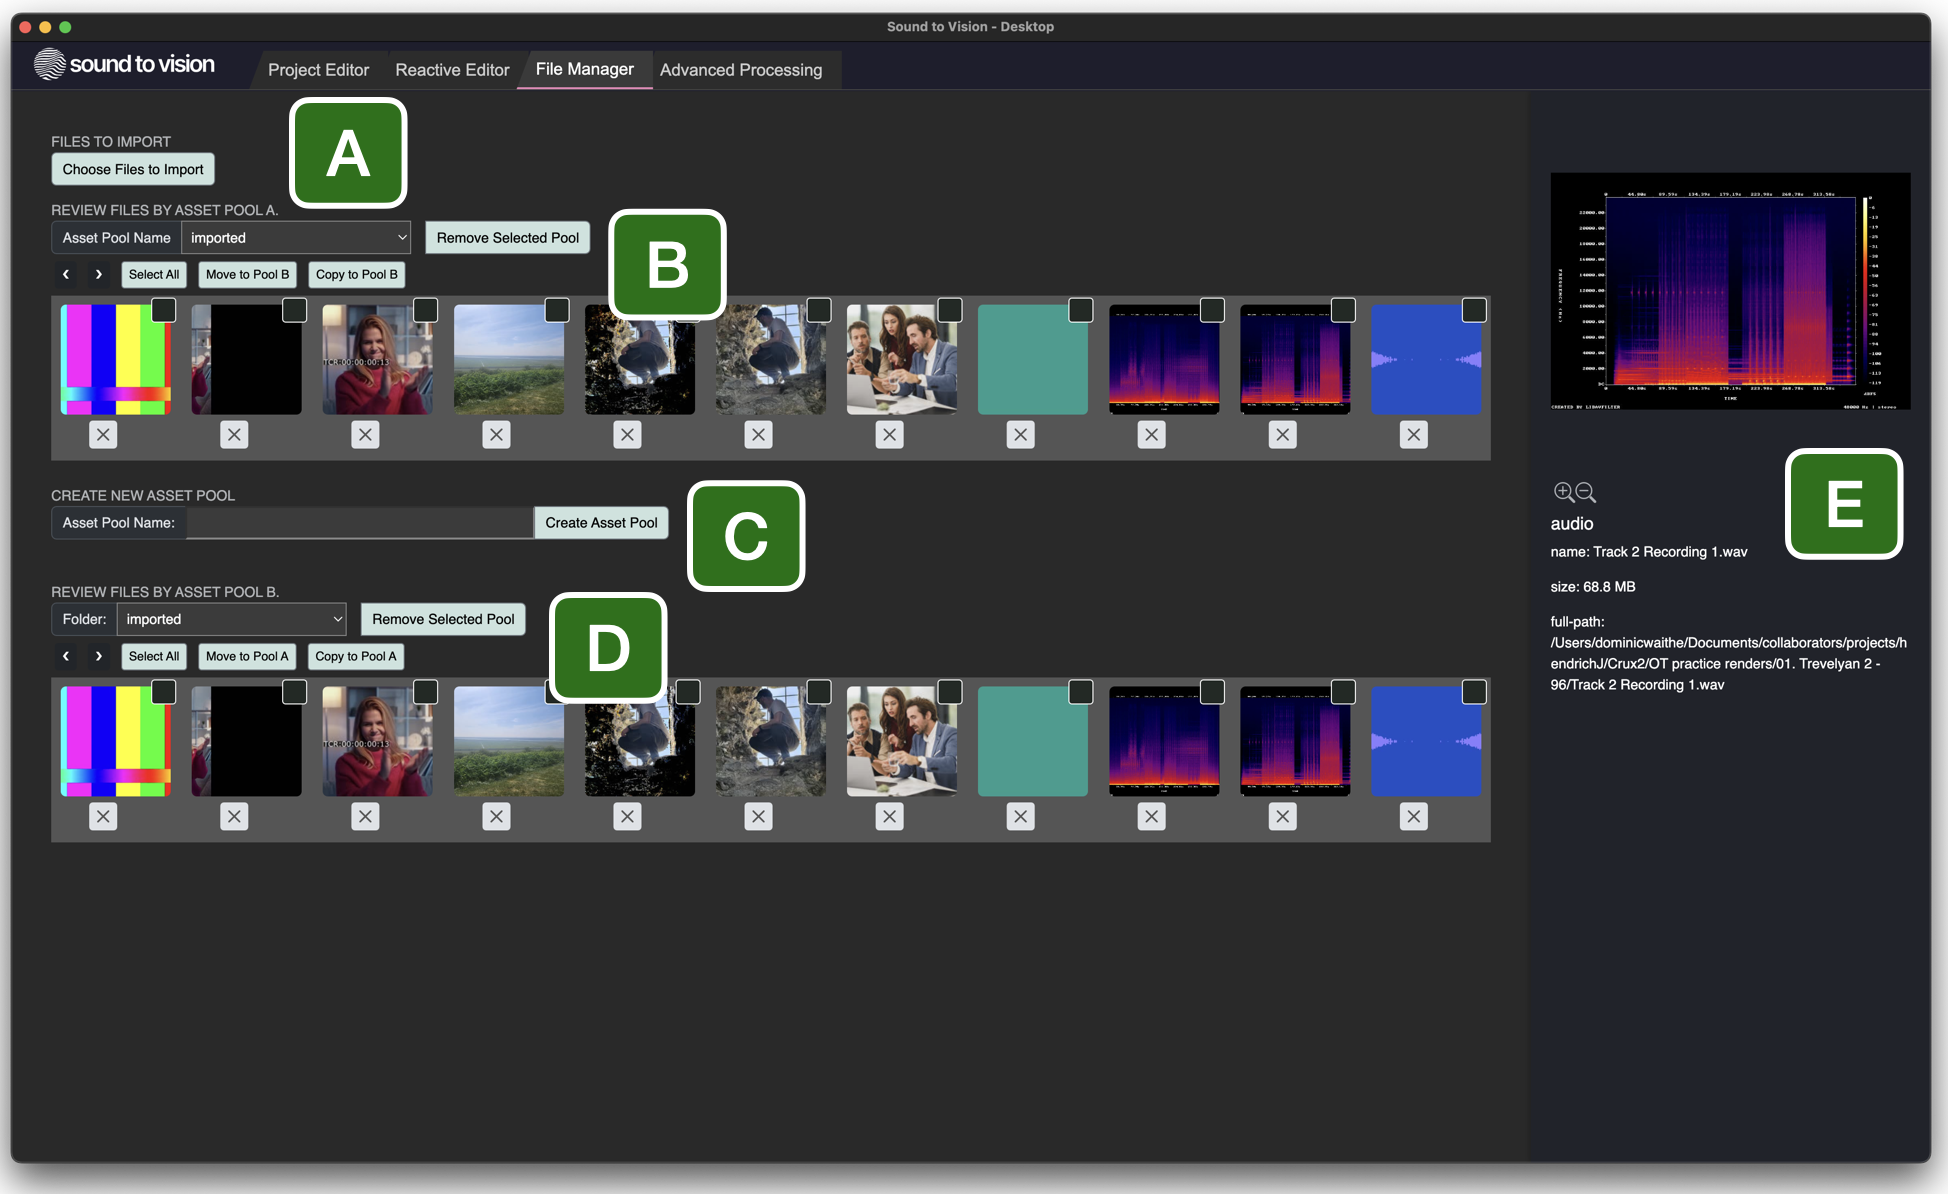
Media files can be imported using the ‘Choose Files to Import’ button (Fig 1A) or by dragging them directly into the interface. Once processed, files appear in the ‘Imported’ pool and are visible when that pool is selected in either Asset Pool A (Fig 1B) or Asset Pool B (Fig 1D).
New Asset Pools can be created using the ‘Create Asset Pool’ button (Fig 1C), where you can assign a custom name. Assets can then be moved or copied between pools by selecting their checkboxes and using the action buttons available within each pool. To preview an asset and view its details, simply left-click any thumbnail in the Asset Pools.
Advanced Processing View
The Advanced Processing view is where SToV-Desktop enables powerful media transformations to create new assets. Different processing methods are available depending on the type of asset — whether it’s a video, photo, stack, or audio file.
Once a processing method is selected, a contextual interface appears to guide you through the necessary steps. After user input is complete, the asset is processed and the output is generated automatically.
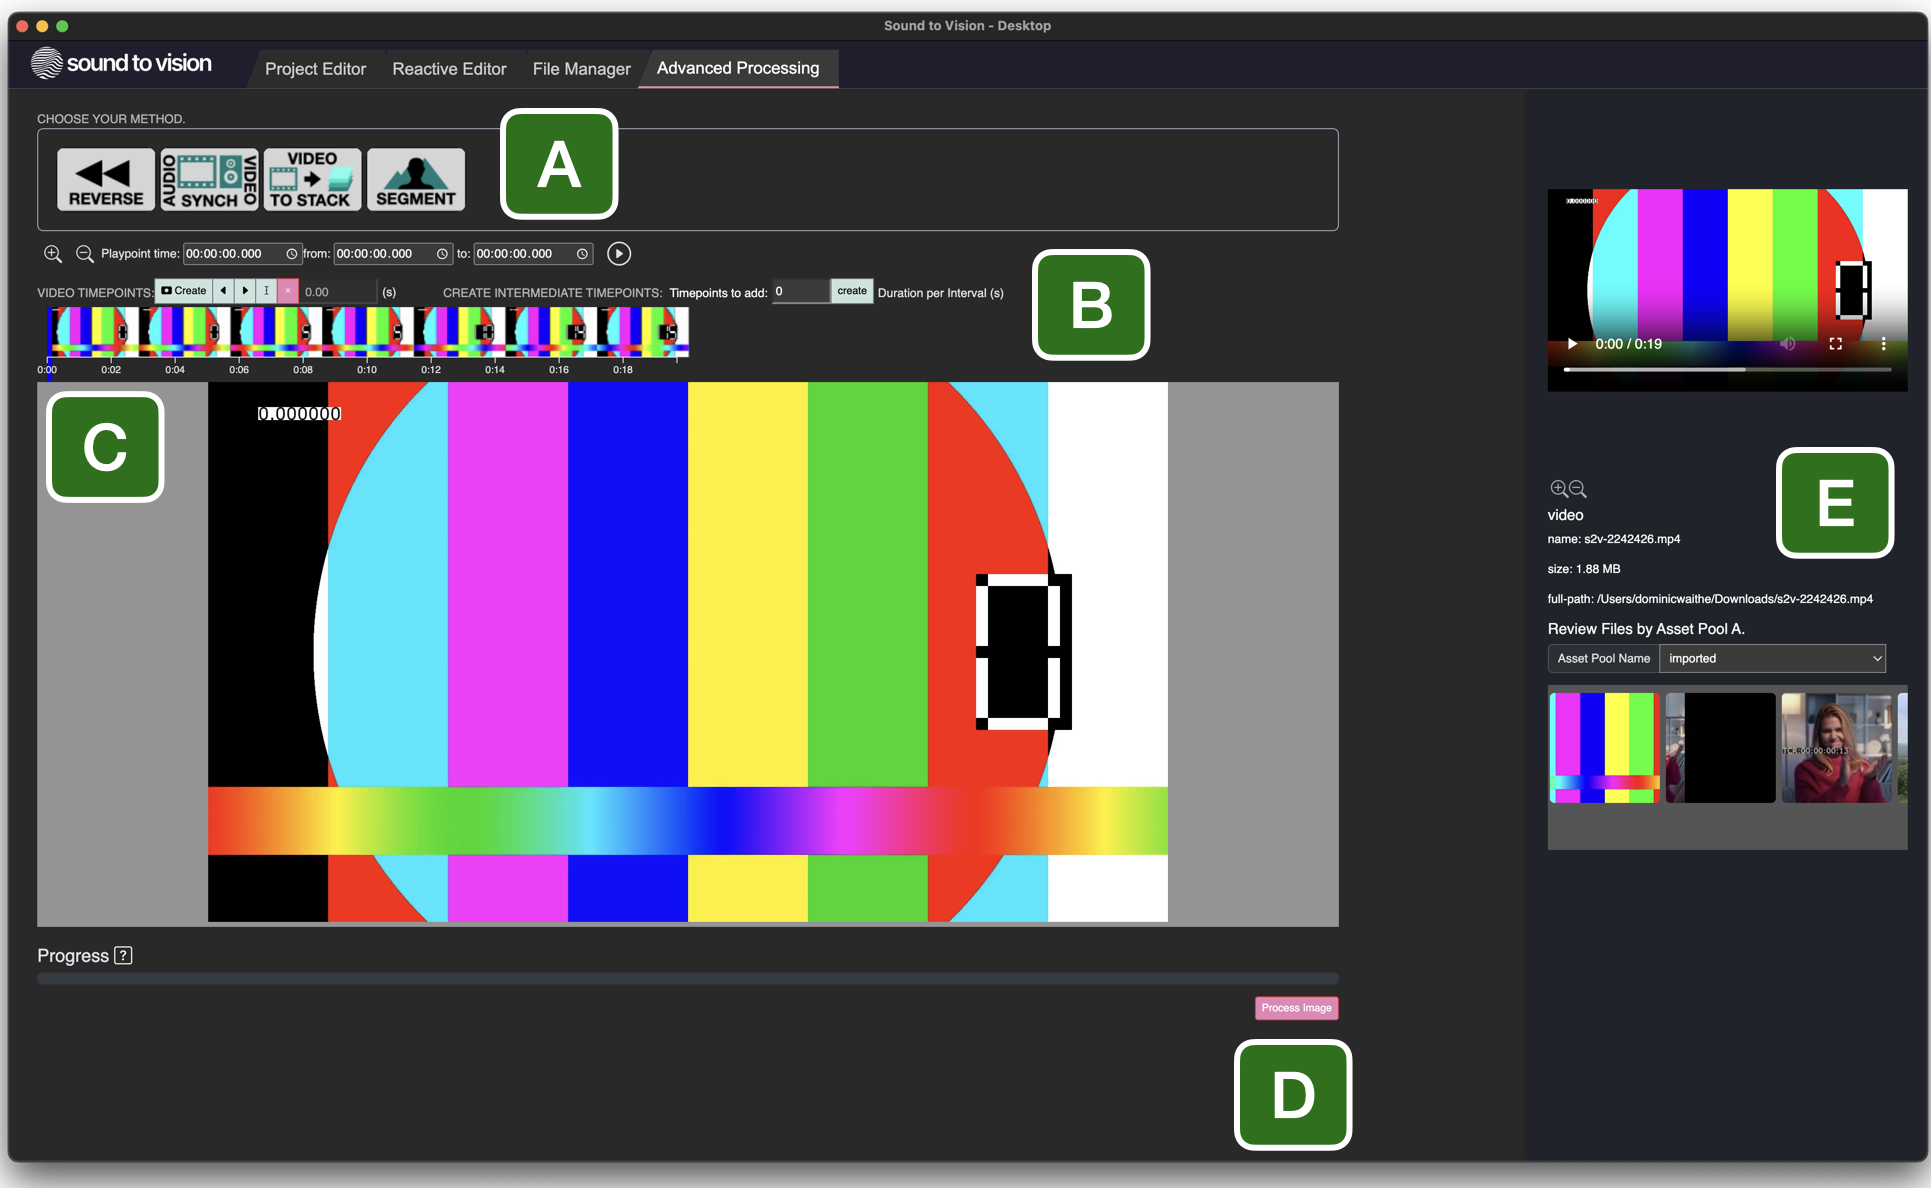
The first step is to select the asset you want to process from the Asset Preview Pane (Fig 2E). Once selected, choose a processing methodology from the list (Fig 2A). Note that certain methods are specific to particular asset types (e.g. image, video, stack, or audio).
After selecting a method, the corresponding control interface will appear (Fig 2B). Here, you’ll be prompted to enter any required parameters or settings. These inputs define the processing conditions.
When ready, click the ‘Process’ button (Fig 2D) to begin. A progress bar will indicate the status of the operation. Once complete, a ‘Download’ button will appear, allowing you to retrieve the newly processed asset.